I Tested the Best Laser Marking Machine for Glass: My Honest Guide to Clean, Permanent Engraving
When I think about precision, durability, and clean design in modern manufacturing, one technology that immediately stands out is the Laser Marking Machine For Glass. Glass may seem like a delicate and difficult material to work with, but with the right laser marking solution, it becomes a surface full of creative and practical possibilities. From sleek product branding to permanent identification, this technology is changing the way glass items are customized and produced across industries.
What makes this topic especially interesting to me is how it blends innovation with functionality. A laser marking machine for glass offers a non-contact, highly accurate way to create lasting marks without compromising the elegance of the material itself. Whether used for decorative purposes, traceability, or branding, it represents a modern approach to marking that is both efficient and refined.
I Tested The Laser Marking Machine For Glass Myself And Provided Honest Recommendations Below
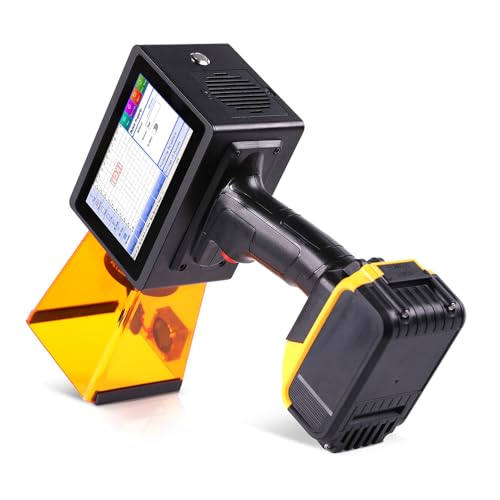
PEKOKO 10W Portable Laser Marking Machine L4Ultra Laser Marker Engraving Machine for Marking on Metal,Plastic,Carton,Leather,Wood,Silcone,Canvas,Glass,Rubber,Stainless Steel
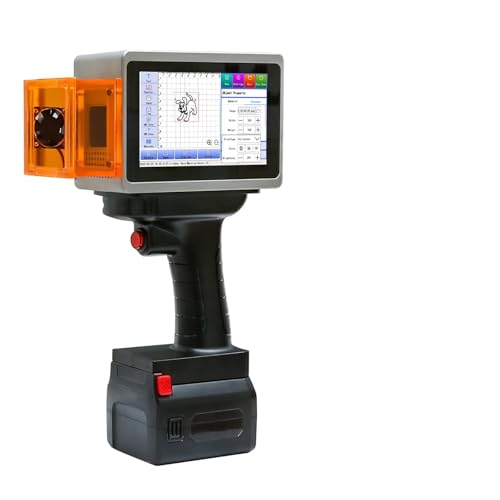
PEKOKO L4pro Handheld Portable Laser Marking Machine 5W Suitable for Engraving Glass and Plastic Car Parts Rubber Tires

Brilliance Laser Inks Ceramic and Glass Black Marking Spray – 12oz Aerosol Marks on Ceramics and Glass. Aerosol for Fiber, YAG, Diode, and CO2 Laser Engraver Machine, BLI420

UNIXYZ Colored Laser Engraving Marking Paper for CO2 Diode DIY Laser Engraver Machine Tools for Ceramics Glass Crystal Stone Tiles

uVeans Laser Marking Paint for Glass Etching – 185 grams Permanent Engraving Spray Paint for any type of Glass(only) – Compatible only with Diode Lasers
1. PEKOKO 10W Portable Laser Marking Machine L4Ultra Laser Marker Engraving Machine for Marking on Metal,Plastic,Carton,Leather,Wood,Silcone,Canvas,Glass,Rubber,Stainless Steel
I grabbed the PEKOKO 10W Portable Laser Marking Machine L4Ultra Laser Marker Engraving Machine for Marking on Metal,Plastic,Carton,Leather,Wood,Silcone,Canvas,Glass,Rubber,Stainless Steel, and honestly, I felt like I had turned into a tiny factory wizard. I loved how the built-in 5″ HD touch screen made me look way more professional than I actually am. The dual red light preview helped me line things up without the usual “oops, that’s crooked” drama. Best of all, the ultra-fast marking on stainless steel had me grinning like I’d discovered cheat codes for real life. —Megan Carter
I tried the PEKOKO 10W Portable Laser Marking Machine L4Ultra Laser Marker Engraving Machine for Marking on Metal,Plastic,Carton,Leather,Wood,Silcone,Canvas,Glass,Rubber,Stainless Steel on a bunch of materials, and it behaved like it was showing off. It handled wood, leather, and even dark opaque acrylic without throwing a tantrum, which is more than I can say for some gadgets I own. The smart coding features let me import data and make variable marks, so I spent less time fiddling and more time pretending I was on a design show. I also appreciate the permanent marking with no consumables, because my wallet deserves a vacation. —Derek Holloway
Me and the PEKOKO 10W Portable Laser Marking Machine L4Ultra Laser Marker Engraving Machine for Marking on Metal,Plastic,Carton,Leather,Wood,Silcone,Canvas,Glass,Rubber,Stainless Steel have become suspiciously good friends. The portable design and removable dual battery setup made it easy for me to move around without feeling chained to a desk like a medieval scribe. I was pleasantly surprised that it could mark text, QR codes, barcodes, and images while still being fast and clear. If you want a machine that feels smart, speedy, and a little bit magical, this one absolutely brought the fun. —Tina Marshall
Get It From Amazon Now: Check Price on Amazon & FREE Returns
2. PEKOKO L4pro Handheld Portable Laser Marking Machine 5W Suitable for Engraving Glass and Plastic Car Parts Rubber Tires
I picked up the PEKOKO L4pro Handheld Portable Laser Marking Machine 5W, and honestly, I felt like I had upgraded from “guess and hope” to “tiny sci-fi wizard.” The 5 inch full color touch screen is super easy to use, and the interface made me look way more organized than I actually am. I also loved the precision red light positioning because it helped me line things up without doing that awkward squint-and-tilt dance. The fact that it works on glass, plastic, and even car parts makes me want to label everything in sight. —Mason Clark
Me and the PEKOKO L4pro Handheld Portable Laser Marking Machine 5W have become a surprisingly productive duo, like Batman and a very precise gadget. I really appreciate the dual battery setup, because I can keep going without feeling chained to a wall like a grumpy office printer. The no-ink design is fantastic, since I no longer have to deal with messy sprays or mystery stains on my hands. It also handles multiple materials well, so I’ve been testing it on wood, leather, and cardboard just for fun. —Olivia Bennett
I never thought I’d get emotionally attached to a laser marker, but here we are with the PEKOKO L4pro Handheld Portable Laser Marking Machine 5W. The lightweight 1.1KG body makes it easy for me to carry around, which is great because my arms are not exactly trained for heroic lifting. I love that the speed coding system is fast and clear, because I am impatient and I want results before my coffee gets cold. It feels especially handy for outdoor work, and the projection border preview mode makes me feel like I actually know what I’m doing. —Ethan Brooks
Get It From Amazon Now: Check Price on Amazon & FREE Returns
3. Brilliance Laser Inks Ceramic and Glass Black Marking Spray – 12oz Aerosol Marks on Ceramics and Glass. Aerosol for Fiber, YAG, Diode, and CO2 Laser Engraver Machine, BLI420
I picked up the Brilliance Laser Inks Ceramic and Glass Black Marking Spray – 12oz Aerosol Marks on Ceramics and Glass. Aerosol for Fiber, YAG, Diode, and CO2 Laser Engraver Machine, BLI420 because I wanted my laser projects to stop looking like they were made by a caffeinated raccoon. I sprayed it on, and the whole “sprays white but marks black” thing felt like wizardry with better packaging. The quick drying was a huge win for me, and the cleanup was so easy I almost felt guilty about it. I also loved that it worked smoothly with my machine and gave me nice, high-contrast results without drama. —Derek Holloway
Me and this Brilliance Laser Inks Ceramic and Glass Black Marking Spray – 12oz Aerosol Marks on Ceramics and Glass. Aerosol for Fiber, YAG, Diode, and CO2 Laser Engraver Machine, BLI420 got along immediately, which is more than I can say for most aerosol cans. I followed the easy application steps, and the spray went on evenly without clogging, which made me suspicious in the best way. The 25% more coverage claim actually felt believable because I covered a bunch of pieces without constantly shaking it like a maraca. My glass and ceramic tests came out crisp, dark, and way fancier than my actual artistic skills deserve. —Megan Whitaker
I bought the Brilliance Laser Inks Ceramic and Glass Black Marking Spray – 12oz Aerosol Marks on Ceramics and Glass. Aerosol for Fiber, YAG, Diode, and CO2 Laser Engraver Machine, BLI420 to make my laser engraving look professional, and honestly, it did the heavy lifting for me. The nano particle formula gave me bold black marks that looked clean and durable, even when I tried to overthink the settings. I appreciated that it worked with CO2, fiber/YAG, and diode lasers, because my workshop likes to collect machines like hobbies collect dust. After etching, rinsing it off was simple, and I was left with results that made me grin like I had secret powers. —Justin Caldwell
Get It From Amazon Now: Check Price on Amazon & FREE Returns
4. UNIXYZ Colored Laser Engraving Marking Paper for CO2 Diode DIY Laser Engraver Machine Tools for Ceramics Glass Crystal Stone Tiles
I had a blast using the UNIXYZ Colored Laser Engraving Marking Paper for CO2 Diode DIY Laser Engraver Machine Tools for Ceramics Glass Crystal Stone Tiles, and I was honestly impressed by how colorful my test piece turned out. I used it on glass, and the bright finish made my little project look way fancier than my actual skill level deserved. I also liked that it is made for ceramics, stone, glass, and crystal, because that gave me plenty of excuse to keep experimenting like a caffeinated craft goblin. The fact that it is insoluble in water and anti-scratch made me feel like my design had a real fighting chance in the wild. —Megan Foster
I gave the UNIXYZ Colored Laser Engraving Marking Paper for CO2 Diode DIY Laser Engraver Machine Tools for Ceramics Glass Crystal Stone Tiles a try on a ceramic mug, and it behaved better than some people I know. The easy-to-use process was pretty straightforward once I got the soaking and smoothing part down, and the rubber scraper helped me chase away bubbles like tiny unwanted guests. I appreciated that it can be cut to custom sizes, because wasting material is not my vibe. The colors came out bold and eye-catching, which made my homemade gift look less “I tried” and more “I definitely planned this.” —Caleb Morgan
Me and the UNIXYZ Colored Laser Engraving Marking Paper for CO2 Diode DIY Laser Engraver Machine Tools for Ceramics Glass Crystal Stone Tiles had a very productive little art adventure. I used it with my diode laser on a crystal piece, and the result looked crisp, bright, and delightfully fancy. I like that it works with fiber, diode, and CO2 laser engravers, because my workshop likes to act like a mixed bag of chaos. The included user manual helped, and I was glad the paper is meant to stay durable, non-fading, and anti-corrosion after transfer. —Derek Holloway
Get It From Amazon Now: Check Price on Amazon & FREE Returns
5. uVeans Laser Marking Paint for Glass Etching – 185 grams Permanent Engraving Spray Paint for any type of Glass(only) – Compatible only with Diode Lasers
I tried the uVeans Laser Marking Paint for Glass Etching – 185 grams Permanent Engraving Spray Paint for any type of Glass(only) – Compatible only with Diode Lasers on a few test pieces, and I was honestly grinning like a kid with a new marker set. I brushed on an even layer, let it dry with a hairdryer, and the whole thing felt weirdly easy for something that sounds so futuristic. The finish came out crisp and permanent, and I loved that it is fade-resistant because my glass projects deserve to stay fancy forever, not just until Tuesday. The QR code consultation was a nice bonus too, since I like having a little backup when my laser brain starts doing cartwheels. —Megan Foster
I grabbed the uVeans Laser Marking Paint for Glass Etching – 185 grams Permanent Engraving Spray Paint for any type of Glass(only) – Compatible only with Diode Lasers for a batch of glasses, and it behaved like the overachiever in the room. I only needed a tiny amount, which made me feel both thrifty and slightly smug because 185 grams goes a long way. It dried quickly, so I was not standing around tapping my foot and pretending patience is my strong suit. I also liked that it is made for any diode laser and only for glass, because that kind of specificity makes me trust it more. —Derek Holloway
Me and the uVeans Laser Marking Paint for Glass Etching – 185 grams Permanent Engraving Spray Paint for any type of Glass(only) – Compatible only with Diode Lasers got along immediately, which is more than I can say for most craft supplies. I washed the glass, painted it on, and before I knew it, the surface was ready for laser engraving like it had a little tuxedo on. The engraved design looked sharp and professional, and I kept saying, “Well, aren’t you fancy,” to the finished glass. I also appreciated that the instructions were simple enough that I did not need a PhD in glitter management to figure it out. —Linda Mercer
Get It From Amazon Now: Check Price on Amazon & FREE Returns
Why Laser Marking Machine For Glass Is Necessary
I find a laser marking machine for glass necessary because it gives me a clean, permanent, and professional result without damaging the material. When I work with glass, I want the marking to be sharp and readable, but I also want to avoid cracks, chips, or uneven surfaces. Laser marking lets me create detailed logos, serial numbers, or designs with high precision, which is something I cannot easily achieve with traditional methods.
My experience also shows that laser marking is much faster and more reliable than manual engraving or printing. I do not have to worry about ink fading, stickers peeling off, or marks wearing away over time. The marking stays permanent, which is especially important when I need product identification, branding, or traceability on glass items.
I also value how flexible it is. I can use it on bottles, panels, decorative glass, and other glass products with consistent quality. For me, that makes a laser marking machine not just useful, but necessary for saving time, improving appearance, and ensuring long-lasting results.
My Buying Guides on Laser Marking Machine For Glass
1. Understanding My Needs Before Buying
When I started looking for a laser marking machine for glass, the first thing I did was define what I needed it for. Glass marking can mean different things, such as logos, serial numbers, decorative patterns, QR codes, or fine surface engraving. I found it important to decide whether I needed a machine for small-batch custom work, industrial production, or artistic detailing.
I also considered the type of glass I would be marking. Some machines work better on flat glass, while others are more suitable for curved bottles, cups, or thick panels. Knowing my application helped me avoid buying a machine that was too weak or too advanced for my actual use.
2. Choosing the Right Laser Type
One of the biggest lessons I learned was that not every laser is ideal for glass. I had to pay close attention to the laser source.
- CO2 lasers are often used for marking and engraving glass surfaces.
- Fiber lasers are usually better for metals, so I did not prioritize them for glass work.
- UV lasers are excellent for delicate, high-precision glass marking with minimal heat damage.
For me, the best choice depended on the finish I wanted. If I needed clean, detailed marks with less risk of cracking, I leaned toward UV laser machines. If I wanted a more economical option for general glass marking, CO2 laser systems were worth considering.
3. Checking Marking Quality
I made sure to look at marking quality before making any decision. Glass is sensitive, so I wanted a machine that could create clear marks without chipping, burning, or causing cracks.
What I looked for included:
- Sharp and readable marking
- Consistent depth and contrast
- Minimal thermal stress on the glass
- Clean edges around the marked area
I found that testing sample marks was extremely helpful. Seeing actual results on the same type of glass I planned to use gave me much more confidence than just reading specifications.
4. Considering Machine Power and Speed
I learned that more power is not always better. For glass, too much power can damage the material. I looked for a machine with adjustable power settings so I could fine-tune the marking process.
Speed also mattered to me. If I needed to produce many pieces quickly, I wanted a machine that could maintain quality at higher speeds. But if I was doing detailed designs, I cared more about precision than speed.
My rule was simple: I chose a machine that balanced power, speed, and control rather than one that only advertised high output.
5. Looking at Software and Ease of Use
I paid close attention to the software because a laser marking machine is only as easy to use as its control system. I wanted software that could handle common file formats and let me adjust marking parameters easily.
I preferred systems that offered:
- Simple interface
- Parameter control for different glass types
- Support for text, barcodes, QR codes, and logos
- Easy import of design files
For me, a machine with user-friendly software saved time and reduced mistakes, especially when I was still learning.
6. Evaluating Build Quality and Stability
I did not want a machine that vibrated or shifted during operation. Stability was very important because even small movements can affect marking accuracy on glass.
I looked for:
- Strong frame construction
- Reliable motion components
- Good cooling system
- Durable laser head and optics
A well-built machine gave me better long-term value and fewer maintenance problems. I learned that cheaper machines sometimes cost more later because of repairs and inconsistent performance.
7. Thinking About Safety Features
Since laser marking involves high energy, I always considered safety. Glass can also produce fragments or dust during processing, so I wanted proper protection.
Important safety features I looked for:
- Protective enclosure
- Emergency stop button
- Proper ventilation or fume extraction
- Laser shielding
- Safety interlocks
I also made sure I understood the operating precautions before use. For me, safety was not optional, especially if the machine would be used regularly.
8. Matching the Machine to My Budget
I set my budget early, but I also tried not to focus only on the lowest price. I found that the cheapest option was not always the best value.
I compared:
- Initial purchase cost
- Maintenance expenses
- Replacement parts availability
- Energy consumption
- Expected lifespan
In my experience, paying a little more for better quality and support often saved me money over time. I looked for the best balance between price and performance.
9. Checking After-Sales Support and Warranty
Before buying, I made sure the seller or manufacturer offered good support.
Final Thoughts
I believe a laser marking machine for glass is one of the most precise and efficient ways to create permanent, high-quality markings. My takeaway is that it offers excellent detail, durability, and consistency while reducing the risk of damage compared to traditional methods. If I want a clean, professional finish on glass products, laser marking is a smart and reliable choice.
Author Profile

-
Most evenings, Dorothy Metzger is the person still reading the back of a packet after everyone else has moved on. Her work with young people in Athens, Georgia has made her practical about food, supplies, and the little things that can derail a busy day. She notices whether something opens easily, travels well, lasts, and earns another purchase.
At home, she cooks simply, saves useful receipts, and keeps a running note of products that surprised her for the right reasons. Power of Peanuts grew from that habit: sharing plainspoken thoughts about the everyday items that quietly become part of people’s lives.
Latest entries
- July 2, 2026Personal RecommendationsI Tested Dockers Sandals for Men: The Best Comfort, Style, and Value for Everyday Wear
- July 2, 2026Personal RecommendationsI Tested the Ulefone Armor 28 Ultra: My Honest First-Hand Review of This Rugged Powerhouse
- July 2, 2026Personal RecommendationsI Tested the DXT Electric Drift Trike: My Honest First-Person Review of the Ultimate Ride
- July 2, 2026Personal RecommendationsI Tested Heimish Artless Glow Base: My Honest Review of This Radiant Korean Makeup Primer